Appearance
Getting Started
Step 1 - Select a Tool
To interact with Zypr's API, you will need to use Swagger UI or select a command-line tool like cURL, a client application tool such as Postman, or a IDE tool like VS Code with the REST Client extension to script in your preferred language.
This tutorial uses Swagger UI.
Step 2 - Create a User Account
Creating a user account is a two-step process using two different endpoints. The first step requires defining yourself to receive an activation code. In the second step, the activation code is used in a different endpoint to confirm your identity and issue you an API key.
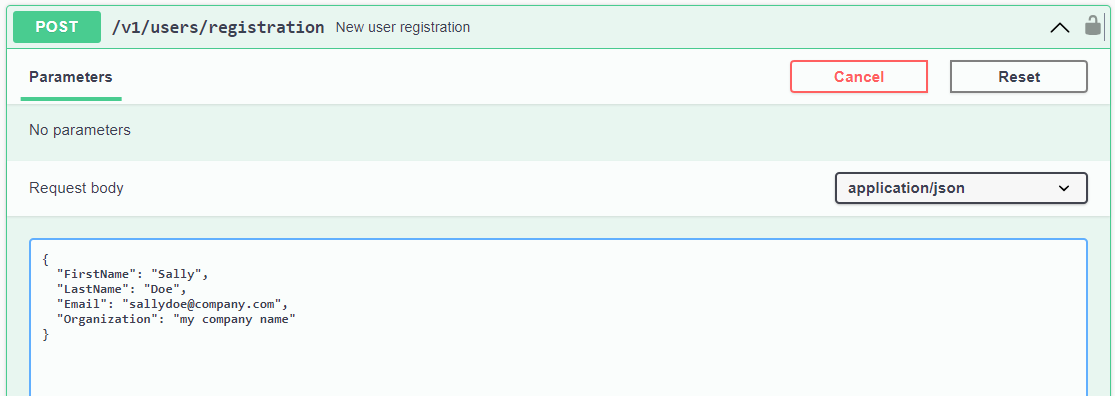
To define yourself, your User request object should have this form:
Request object
json
  {
    "FirstName": "Sally",
    "Email": "sallydoe@company.com",
    "Organization": "my company name"
  }
Using the Swagger UI page, go to the User Accounts section and the endpoint with the description: "New user registration", click the "Try it out" button, complete the object with your user information, and click the blue Execute button.
You should receive a response object notifying an email was sent to you and contains an activation code.
Response object
json
  {
    "Email sent to sallydoe@company.com
     that contains activation code."
  }
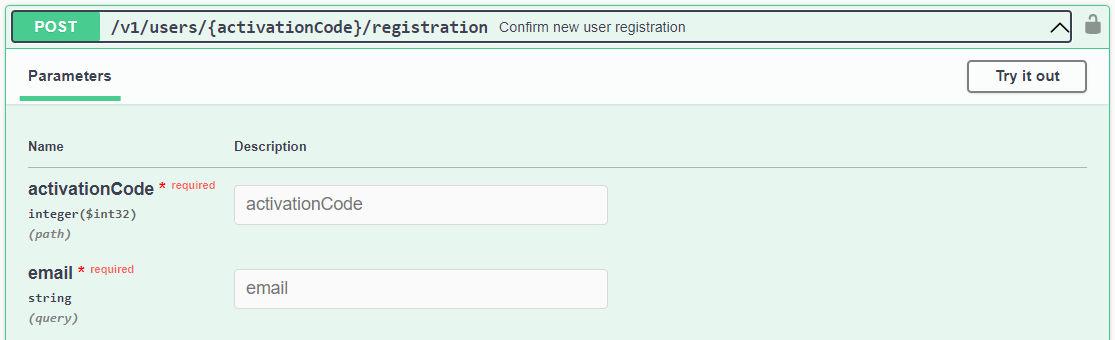
After you have received your activation code, go to the endpoint with the description: "Confirm new user registration", click the "Try it out" button, enter your activation code and email address you used to register, and click the blue execute button.
The response object you receive depends upon whether your organization already has an enterprise account setup to use Zypr. If your organization doesn't, you will be setup in the role of a "Trial User" in your user account.
If your organization has an enterprise account, you will be setup in the role of "User" in your user account. Next, you need to contact your organization's Zypr account administrator. That person can update your user account to an "Active" status. Once that is completed, you will be able to execute simulations. You can read more here.
Response object
json
  //response if role is Trial User
  {
    "Email": "sallydoe@company.com",
    "Role": "Your role name",
    "Status": "Active",
    "ApiKey": "xxxxxxxxxxxxxxxxxxxxx",
    "ApiKeyExpiration": "date"
  }

  //response if role is (customer account) User
  {
    "Email": "sallydoe@company.com",
    "Role": "Your role name",
    "Status" : "Inactive",
    "ApiKey": "xxxxxxxxxxxxxxxxxxxxx",
    "ApiKeyExpiration": "date",
    "AccountAdminFirstName" : "first name",
    "AccountAdminEmail" : "xxxxxxxx"
  }
This response object contains your API key. You will need this API key to execute simulations and invoke other API endpoints. Please keep your API key a secret. Do not save or post your API key in a publicly accessible area.
Step 3 - Select a Model
The Pool Resource Model Repository contains a variety of quick-start models for common use-cases.
Find a model of interest and note its repository lookup codes (i.e., Id and Version). You will use those values to retrieve a complete model from Zypr's repository using the endpoint in Utilities.
To continue with next steps, you now need to be authenticated. Near the top of the Swagger UI page is a Authorize button. Click on it, enter your api key, click the Authorize button, and close the window.

Now go to the Utilities section and select the endpoint with the description "Quick-start pool resource models". Click on the "Try it out" button, enter the model id and version values, and then click the blue Execute button.
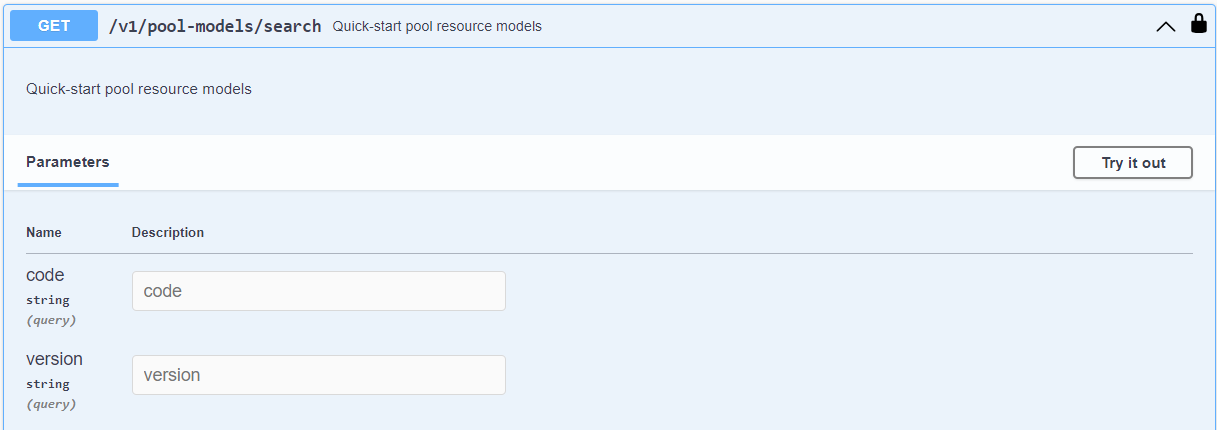
The response object will be a pool resource model.
If you wish to view the model where you can expand/collapse JSON object, copy the Response body, go to this online JSON editor and paste the content into the left-side text-area box. If you collapse the model, it should be similar to the following form:
json
{
  "Settings": {},
  "SimulationRules": {},
  "EvolutionRules": {},
  "ValuationRules": {},
  "NewServerConfiguration": {},
  "PowerConsumptionTerms": {},
  "FacilityConsumptionTerms": {},
  "SoftwareResources":{
      "PoolSoftwareStack":[],
      "SoftwareInventoryTerms":[]
  },
  "ServerInventory":[],
  "JumpEvents":[],
  "Constraints":[]
}
Step 4 - Execute a Simulation
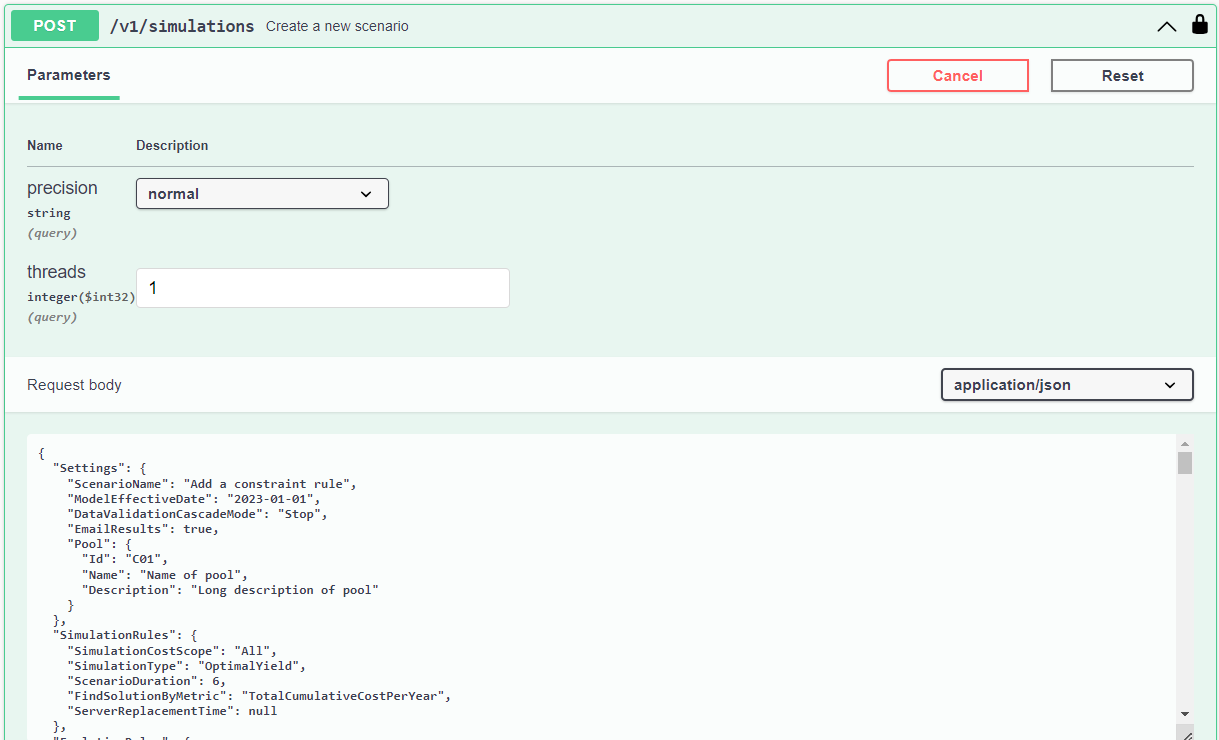
Go to Simulations sections and the endpoint with the description "Create a new scenario", click on the "Try it out" button, erase the "string" comment in the Request body. Paste a copy of the model into the Request body similar to the example below.
Ignore the "precision" and "threads" settings; they are advanced settings for executing a simulation. Click the blue Execute button to request a simulation for this pool model.
The response will be a Scenario object and look similar to this:
json
  {
    "Id": "ke.dfxdohglorarw2ux3n8rv",     // unique scenario id
    "Timestamp": "2023-10-25T01:28:56Z",  // timestamp for this record
    "UserId": "xxxxxxx",
    "StatusNbr": 4,
    "StatusDescription": "Request added to simulator queue",
    "Settings": null,
    "SimulationStates": [
      {
        "StatusTimestamp": "2023-10-25T01:28:56Z",
        "StatusNbr": 4,
        "Message": "Request added to simulator queue"
      },
      {
        "StatusTimestamp": "2023-10-25T01:28:53Z",
        "StatusNbr": 3,
        "Message": "Model validation succeeded"
      },
      {
        "StatusTimestamp": "2023-10-25T01:28:53Z",
        "StatusNbr": 2,
        "Message": "Request started"
      },
      {
        "StatusTimestamp": "2023-10-25T01:28:52Z",
        "StatusNbr": 1,
        "Message": "Received request"
      }
    ],
    "Progress": null,
    "ResourceRequirementsForecast": null,
    "Calendars": null,
    "NoSolutionGraphs": null,
    "Errors": null,
    "ValidationPassed": null,
    "ValidationResults": null
}
This response Scenario object is not the final result, but it does contain the scenario Id. You will need its value at the next step.
INFO
When the requested simulation completes, it will be sent to your email address. This is an optional setting contained in the model's Settings object. All quick-start models have their EmailResults property set to true.
json
"Settings": {
  "ScenarioName": "Create VMware counting rule",
  "ModelEffectiveDate": "2023-01-01",
  "DataValidationCascadeMode": "Stop",
  "EmailResults": true,
}
Step 5 - Retrieve Your Scenario
In the Simulations section, go to the endpoint with the description "Get status of a running simulation or completed scenario", click on the the "Try it out" button, paste the scenario Id into the "scenarioId" text box, and click on the blue Execute button.
The response object is the same Scenario object produced by the "Create a new scenario" endpoint, but with updated values. If your simulation is still executing, the Progress object provides additional information. If the simulation is completed, the StatusDescription will be "Simulator completed". If completed, the ResourceRequirementsForecast object should contain time-series forecasts for each resource type plus their respective statistics.
Several final notes:
All quick-start models have the SimulationType property in the SimulationRules object set to "Optimal". That can be easily changed to "Fixed" and adding the required ServerReplacementTime property. You can read more here about how best to interpret its use.
A pool model with one or more constraints may return a Scenario object with a null ResourceRequirementsForecast object if a value in the Constraints object is too restrictive for any solution to be found. The NoSolutionsGraph object will contain information why various solution attempts did not comply with the specified constraints.
If you forget a scenario Id value, use the Search scenarios endpoint to query your past simulations.
Thanks for trying Zypr! Please reach out to us if you have any questions.